Showing posts with label Eat Me. Show all posts

Tuesday, July 7, 2009

Daily Dinner: Wannabe Southwestern Chicken Empanadas (But Really Just Kind-of Chicken Pot Pies)

Boyfriend and I have decided to try to eat at home more often. When I was at school three nights a week, it became really easy just to go out to eat every night (Chili's Happy Hour!), but now we're trying to cut back and get back to eating at home. It's cheaper, and to be honest, we like it better. (Except for the dishes. Why would I want to do dishes?) Since the beginning of the year, we've tried to reduce the amount of red meat in our diets, so we eat a lot of chicken.


So tonight for dinner, I decided to try at "What can I make from items in my pantry" exercise. I was kind of feeling some Southwestern-style chicken dish, so I settled on a sort of empanada. I already had the chicken, the puff pastry, the cheese, and all the ingredients for a Béchamel (white) sauce. I was going to add some black beans and corn to the filling, but decided to forgo the beans, and honestly, just forgot about the corn.

I thought these little wannabe-empanadas were pretty tasty, but could have used a lot more flavoring, a.k.a. spices. I went easy on the spices to start, because Boyfriend and I don't like overly spicy things. In the end, the wannabes reminded me more of just a miniature chicken pot pie than they did empanadas. The good news is that this means the recipe is easily adaptable to whatever flavors you're craving.

Regarding the recipe, measurements are approximate. I don't think I've ever measured my cream or milk for a Béchamel sauce, so I'm not going to be much help in that department. I used 2 sheets of puff pastry, so essentially doubled this recipe; the ingredients and measurements I'm listing are approximate, as I'm trying to halve the recipe.


Ingredients
1 sheet of puff pastry
1 large boneless, skinless chicken breast
1 tbsp unsalted butter
1 tbsp all-purpose flour
heavy cream or milk (at least 2%)
1/8 tsp chili powder
1/8 tsp ground coriander
1/4 - 1/2 pre-packaged nacho/taco cheese mix
Kosher salt

Directions
1. Fill a saute pan with a couple of inches of water. Salt the water, and bring to a boil. Add the chicken breast and cover the pan. Reduce heat to medium-high, and let cook for approximately 7-10 minutes. (This will cook the chicken and keep it nice and juicy.)

2. While the chicken is cooking, make the Béchamel sauce. Melt butter over medium heat and then whisk in flour until fully incorporated. Add heavy cream or milk (start small - 1/2 cup to start, then add more as you go), and continue to stir until sauce has thickened. Sauce should be thicker, but not really thick or heavy. Whisk in chili powder over the heat.

3. Using 2 forks, shred the chicken and place in small bowl. Sprinkle kosher salt and coriander over chicken and stir.

4. Pour Béchamel sauce over the chicken and stir. You want the chicken to be lightly coated, not drenched in sauce. Add cheese to bowl and stir. Set aside.

5. Roll out puff pastry to 12" x 12" square. Cut square into either 9 or 6 squares, depending on how full you want the little pies to be. Place equal amount in the center of each square.

6. Seal each square into a triangle. You can wet your fingertip and run it along the edge of the square to help seal the pies. Use a fork to crimp the edges. I would also recommend using a knife to cut a small slit in the top of each pie to allow steam to escape during baking.

7. Bake pies on aluminum foil-lined baking sheet for 15 minutes at 400 degrees F, or until golden brown on top.

If you want more flavor, I would definitely increase the spices, or add some stronger ones. In addition, for a more southwestern flavor, I might add in some tomato paste or chipotle peppers to the Béchamel sauce. You could also try the following variations:
  • Italian - crushed tomatos, basil, oregano, Parmesan cheese
  • Asian - soy sauce, sesame oil, ginger, shredded veggies
  • Other - caramelized onions, thyme, Cheddar cheese

Monday, June 8, 2009

Craving Satisfaction: Chocolate Ganache

I don't know who was the first person to combine melted chocolate with heavy cream over a slowly simmering pot of water, or why, but I love them for it. My food cravings typically come courtesy of too many hours spent sprawled across the couch, taking in (almost) everything Food Network has to offer (I'll be honest, there are hosts on that show I really don't care for). I watched Ina Garten (also known as Barefoot Contessa) make some chocolate cupcakes with a chocolate ganache frosting, and I instantly wanted some.


Except, I didn't. What I really wanted was the ganache. You see, I had just recently savored my last bit of some of the best chocolate cake I've ever had (last bit unbeknownst to me, because I would return home one night to discover Boyfriend had eaten the very last bit), and was seriously craving some decadent chocolate ganache.

Oh chocolate ganache. So right, and chocolately, and so delicious when paired with the right cake, and then kept in the refrigerator for me to steal a covert nibble here and there when I need some chocolate. Or deliciousness. Look! (Hear?) Even the word ganache is lovely to say (thank you, France).

So the process went like this: I wanted some ganache, which was simple enough. But what to pair it with? I wasn't in the mood for making chocolate cake, and then I was craving yellow cupcakes with a thick, rich layer of chocolate ganache on top. So I made a batch of cupcakes. And they burnt on the bottom. And tasted too eggy. They sat on the counter for 2 days, and then they all went in the trash.

Boyfriend went hiking on Sunday, so I crated the puppy, and headed off to the grocery store. To make or to buy? To be authentic or to cheat? I took the easy way out, courtesy of Duncan Hines's Moist Deluxe Classic Yellow Cake mix. My favorite yellow cake. So moist and light, with just the right amount of dense crumbs so that it feels like a very luxurious cake. And they offer a low-fat recipe, too. I was hooked. And later, culinarily satisfied.

Ingredients
For the Cupcakes
1 box Duncan Hines Moist Deluxe Classic Yellow Cake mix
1 cup water
1/3 cup unsweetened applesauce
3 eggs

For the Ganache
8 oz semi-sweet chocolate chips
1/2 cup (4 oz) heavy cream
Note: Original recipe calls for 1/2 tsp of instant coffe granules, which I omitted.

For the Toppings
Nestle Toll House Mini Chocolate Chips
Nonpareils (not the candy)

Directions
For the Cupcakes
1. Empty all ingredients into a bowl. Whisk or stir together. Note: I have found that sifting the boxed cake mixes yields batter with significantly less lumps or pockets of dry mix.

2. Portion out and cook according to package directions. Decrease time 1 - 2 minutes if using applesauce. Recommend an ice cream scoop for portioning out cupcakes.

For the Ganache
1. Fill medium pot with about 1 - 2 inches of water, and set over medium high heat. [Or, alternatively, use a double boiler.]

2. Place chocolate chips in heatproof bowl, and place bowl over pot of water. Make sure the bottom of the bowl is not touching the water.

3. Add heavy cream, and stir until chocolate has melted and ganache is shiny.

Note: Alternatively, you can put chocolate chips in one bowl, and heat cream only in a pot, and then pour cream over chocolate chips, and stir.

For the Toppings
1. When cupcakes have cooled, place cupcake upside down in ganache. Give it a good dunk, up until the lip of the cupcake. Swirl cupcake in ganache, and pull up while twisting, to keep chocolate from dripping off.

2. After you have frosted all cupcakes, sprinkle with chocolate chips or nonpareils (or both, or anything else, whichever you like).

3. Let cupcakes and frosting set, approximately 3 hours. You can eat them right away, but the chocolate will be more melty, and less thick.


If you're looking for more information ganache, check out Wikipedia. If you're looking for the complete recipe I used, go to Food Network's website. Please note that this recipe is for chocolate cupcakes and chocolate ganache.

Sunday, May 31, 2009

Indulgent Breakfast: Best Blueberry Muffins

I think it's always a bit risky to label any recipe as the "best" anything, especially [baked] classics, like apple pie, chocolate chip cookies, and yes, blueberry muffins.  However, Cook's Illustrated (from America's Test Kitchen) did just that.  I have to say that I have a weird relationship with blueberries - when I was a kid, I'm pretty sure I liked them a lot.  Then at some point, I didn't (same with raisins, YUCK!).  And I didn't for a while, but recently I have started to like them again, especially in or paired with baked goods.


I've never really been a fan of blueberry muffins, mainly because the ones you get at the store are usually huge and, in my opinion, leaning towards the dry side.  I also usually find them to be pretty sparse on the blueberry flavor.  My favorite types of muffins are coffee cake (with cinnamon streusel on top, of course) and chocolate chip.  However, when I ran across this recipe, the muffins looked pretty good (even in black and white pictures), so I decided to give them a try.

So let me tell you, these are by far, hands-down, the very, very best blueberry muffins I have ever had.  They are flavorful, with the just the right amount of blueberries, and are super moist.  I followed this recipe almost exactly to the letter, with the exception of one thing: I used sanding sugar instead of regular granulated sugar.  I prefer sanding sugar for toppings, and it adds a nice, crunchy texture to the top of the muffin.

As another note, I would highly recommend that you get your mise en place set up before starting to make these muffins.  I don't always do mise en place, but I would definitely recommend it for this recipe.  The recipe calls for fresh blueberries, but you can also use frozen blueberries with some changes.  I haven't tried the recipe with frozen blueberries, but I've included the changes below.  There are also a few variations for the topping (streusel, orange glaze, and almond crunch), but I haven't included them.  If you are interested in them, please leave a comment as to which one you are interested in.

The recipe calls for 10 ounces of blueberries; I've made these using two 4 oz. (so 8 oz. total) containers every time, and the muffins come out fine.  I also recommend weighing the ingredients, as opposed to measuring them, where the weights are noted.  The exception to this would be the sugar for the topping and the blueberries.

Ingredients
For the Lemon-Sugar Topping
1/3 cup (2 1/3 ounces) sugar [I recommend sanding sugar]
1 1/2 tsps finely grated zest from 1 lemon

For the Muffins
2 cups (approximately 10 ounces) fresh blueberries, picked over, with stems and bad blueberries thrown out
1 1/8 cups (8 ounces) plus 1 tsp sugar
2 1/2 cups (12 1/2 ounces) unbleached all-purpose flour
2 1/2 tsps baking powder
1 tsp table salt
2 large eggs
4 Tbsps (1/2 stick) unsalted butter, melted and cooled slightly
1/4 cup vegetable oil
1 cup buttermilk
1 1/2 tsps vanilla extract

Directions
For the Topping
Stir together the sanding sugar and lemon zest in a small bowl until combined.  Set aside.

For the Muffins
1.  Melt the butter over low heat, and set aside.  (I include this as a step because I frequently forget to do it!)

2.  Adjust the oven rack to upper-middle position, and preheat the oven to 425 degrees F.  Spray a standard muffin tin with non-stick cooking spray.

3.  Bring 1 cup blueberries and 1 tsp sugar to a simmer over medium heat.  Cook, mashing berries with a spoon (I find a fork works very well, maybe even better) several times, and stirring frequently, until the berries have broken down and the mixture has thickened and reduced to 1/4 cup (you will just have to eyeball this measurement), approximately 6 minutes.  Transfer the mixture to a small bowl, and let cool to room temperature, 10 to 15 minutes.

4.  Whisk together flour, baking powder, and salt in a large bowl.  Set aside.

5.  Whisk remaining 1 1/8 cups of sugar and the eggs together in a medium bowl, until thick and incorporated, about 45 seconds.

6.  Slowly whisk in the butter and oil until combined.  Whisk in the buttermilk and vanilla until combined.

7.  Using a rubber spatula, fold the egg mixture and the remaining cup of blueberries into the flour mixture until just moistened.  The batter will be very lumpy with few spots of dry flour.  Do not overmix the batter, or your muffins will be tough.

8.  Use an ice cream scoop or large spoon to divide the batter equally among the muffin cups.  The batter should completely fill the cups and mound slightly.  You should have enough batter for exactly 12 muffins.

9.  Spoon a teaspoon of the cooked blueberry mixture into the center of each mound of muffin batter.  Using a chopstick or a skewer, gently swirl the blubeberry filling into the batter, using a figure-eight motion.

10.  Sprinkle the lemon sugar evenly over the muffins.

11.  Bake until muffn tops are golden and just firm, 17 to 19 minutes, rotating the muffin tin from front to back, halfway through baking tin.

12.  Cool muffins in muffin tin for 5 minutes, then transfer to wire rack and let cool 5 minutes before serving enjoying.

For Frozen Blueberries
Follow the recipe above, substituting 2 cups of frozen berries for the fresh ones.  Cook 1 cup of the berries as directed in step 3.  Rinse the remaining cup of berries under cold water and dry well.  In step 7, toss the dried berries in the flour mixture before adding the egg mixture.  Proceed with the recipe from step 7/8 as directed.

I made a batch of these muffins with the blueberry filling and without.  While you can certainly get by without the blueberry filling, the muffins do taste better with it, even if they are a bit stickier.  If you make it without the filling, I'd put more blueberries in the batter.  And if you are tempted by these muffins, but know you should eat them (like me :)), remember what Weight Watchers says: a muffin is just a cake with a hat on it.  Although, that line never worked on me.

Friday, May 29, 2009

Mother's Day Cake: Devil's Food Cake with Swiss-Meringue Buttercream

I come from a great family of unofficial cookers and bakers (meaning that is not anyone's profession).  I grew up with a home-cooked meal pretty much every night, and have fond memories of baking with my mom for holidays, and indulging in delicious treats made by grandparents.  I'm now the unofficial dessert maker for family occasions, and I love finding great recipes or making up new ones as I go.


For Mother's Day, my aunt asked for 2 desserts, and requested that at least one of them be chocolate.  There were a lot of options, but I was itching to practice frosting and decorating again, so I decided to make a cake.  It was going to be a relatively small group, and I knew that cake-eating would be a tad limited (people watching their weight, grandparents watching their sugar intake), so I stuck with a basic 9" round cake, but I cut each cake round in half, to make a 4-layer cake.

You don't need any fancy equipment for this one, but let me say that if you're going to "splurge" on cake pans, I recommend Chicago Metallic pans for just about anything, and even these are not too expensive.  (I've picked some up for less than $10).  I also recommend getting the non-nonstick ones (lighter and shinier pans).  Even though these pans require more work (what with the buttering and flouring and parchment-papering), these cakes are much less prone to burning or hard edges.  As for the pans themselves, they are a nice, deep pan with more defined edges, that will lend themselves to crisper, more defined cake shapes. 

At a minimum, you will need the following equipment if you want to replicate the cake, including design:
  • Stand or hand mixer, with both beater and whisk attachments
  • Double boiler (either a two-pan double boiler, or a heatproof bowl and a large pan)
  • Offset or frosting/icing spatula [you can use a knife for this, but it will not look as clean]
  • Cake stand (preferably one that turns)
  • Shell, flower, and round frosting tips and connectors
  • Piping bags
The recipe for both the cake and the frosting comes from Martha Stewart's Baking Handbook.  The recipe for the cake is meant to be frosted with mint-chocolate ganache, but I went with a more traditional frosting, a Swiss-meringue buttercream.  I'll probably try this cake with the ganache at some point though.  If you can't find or don't have Dutch-process cocoa handy, you can go ahead and use regular cocoa powder; your cake will end up a bit lighter in color.  I did a straight substitution in my cake (even though there are some other generally recommended changes if you substitute), and didn't notice much difference, except in the color.

Please note that I doubled the frosting recipe for this cake, but only gave you the recipe for one batch, which makes approximately 4 cups.

For the Cake
Ingredients
3 sticks (1 1/2 cups) unsalted butter, room temperature + more for pans
3/4 cup Dutch-process cocoa powder, sifted + more for pans
3/4 cup hot water
3/4 cup sour cream
3 cups cake flour (not self-rising), sifted
1 tsp baking soda
1/2 tsp salt
2 1/4 cups sugar
4 large eggs
1 Tbsp pure vanilla extract

Directions
1.  Preheat the oven to 350 degrees F.

2.  Butter two 9x2 inch round cake pans, and then line the bottoms with parchment paper.  Butter the parchment, and then dust with cocoa powder, tapping out the excess.

3.  In a medium bowl, whisk the cocoa with the hot water until smooth.  Whisk in sour cream, and let mixture cool.

4.  In a medium bowl, sift together flour, baking soda, and salt.  Set aside.

5.  In the bowl of the mixur, beat butter and sugar together on medium speed until light and fluffy, about 3 - 4 minutes.

6.  Add the eggs, one at a time, beating to combine after each addition.  Scrape down the sides of the bowl as needed.

7.  Beat in vanilla.

8.  With mixer on low speed, add the flour mixture in two parts, alternating with the cocoa mixture, and beginning and ending with the flour.  So basically: add half the flour, then the entire cocoa mixture, then the remaining half of the flour mixture.  Beat until combined.

9.  Divide the batter between the prepared pans, and rap the pans on the counter to level and release any trapped air.  Smooth the top of the batter with a spatual.

10.  Bake until a cake tester or toothpick inserted in the center comes out clean, approximately 45 to 50 minutes.

11.  Transfer the pans to a wire rack to cool for 15 minutes.  Invert the cakes onto the rack, and peel of the parchment paper.  Reinvert the cakes, and let them cool completely, with the top sides up.  [I just left the top sides down, and they came out fine.]

For the Frosting
Ingredients
4 large egg whites
1 1/4 cups sugar
3 sticks (1 1/2 cups) unsalted butter, room temperature, cut into tablespoons
1 tsp pure vanilla extract

Directions
1.  Either in a double boiler or in a heatproof bowl set over a pan of simmering water, combine the egg whites and sugar.  Cook, whisking constantly, until the sugar has dissolved the mixture is warm to the touch (about 160 degrees F).  [Enjoy this step.  You won't have to do any arm workouts for a couple days after this one.]

2.  If using a stand mixer, add the mixture to the bowl of the stand mixer; otherwise, you can just use the same bowl.  Using the whisk attachment, beat the egg-white mixture on high speed until stiff (but not dry) peaks hold.  Continue beating until the mixture is fluffy and cooled, for about 6 minutes.

3.  Switch to the paddle or beater attachment, and with the mixer on medium-low speed, add the butter several tablespoons at a time, beating well after each addition.  If the frosting starts to separate after all of the butter has been added, beat on medium-high speed until smooth again, 3 to 5 minutes more.

4.  Beat in the vanilla.  Beat on the lowest speed to eliminate any air bubbles, for about 2 minutes.  Stir with a rubber spatula until the frosting is smooth.

Note on Storing the Frosting
If you'll be using the frosting within several hours, cover it with plastic wrap and keep it at room temperature.  You can also refrigerate frosting in an airtight container for up to 3 days, or freeze it for up to 1 month.  Before using, bring the frosting to room temperature, and beat with an electric mixer on the lowest speed until smooth.

Assembling and Frosting
I can't really give you many tips for frosting and assembling the cake, as it's fairly straightforward: cut the top off each round, cut each round in half, frost in between the layers, frost, and then decorate.

Some tips for a well-frosted cake:
Use simple syrup.  Apply simple syrup (equal parts sugar and water) with a pastry brush to each layer to help seal in or add moisture.  [Sadly, I never remember to do this.]

Do a crumb coat.  A crumb coat is a very light layer of frosting that you put on the cake, which helps to avoid getting crumbs in the final frost.  Then you put the cake in the refrigerator for about an hour or so to let the crumb coat set, and then put another layer of frosting on top.  This layer would be much fuller and heavier, and is what you will see in the finished product.

Work from the inside out, and the top down.  Add a huge dollop of frosting to the top of the cake, and use an offset or frosting spatula with a cake turntable to push the frosting out to the sides, and then push the frosting down the sides.

A cake turntable + offset spatula are the best tools.  These two tools used together will give you a very nice looking frost, and are very easy to use once you get the technique down.  The key is just to let the tools do the work.


Tuesday, May 26, 2009

Memorial Day Dessert - WW Lemon Berry Tart

My parents came over for dinner on Sunday, largely in part to check out our sweet new patio furniture.  Too bad it rained about 2 minutes before we were ready to sit down to eat.  My mom is currently doing Weight Watchers (epic fail on that front for me), so I made the whole meal using WW recipes (awwww) so it would be easier to keep track of points.  The hardest part about this was picking out a dessert.  I love rich, decadent desserts, but I knew that wasn't going to fly for this dinner.


This recipe is super easy to make - it has 4 ingredients, and takes less than 15 minutes to make (and is taken, appropriately enough, from a magazine full of 5 (or less)-ingredient, 15-minute (or less) dishes).  The filling is crazy delicious - light, creamy, and cool - and the graham cracker crust is a great contrast.  No need for a long intro here; let's get to it.

Ingredients
4 pre-made miniature graham cracker crusts (such as those by Keebler)
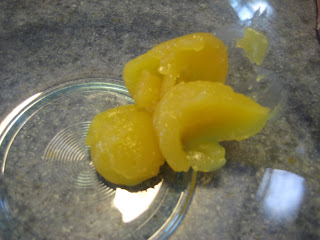
3 Tbsps lemon curd
1 1/2 cups of low-calorie Cool Whip (you can go all out with the regular Cool Whip if you're not counting points; fat free Cool Whip is not required)
1 1/2 cups of fresh berries (I used strawberries, blueberries, and raspberries)

Directions
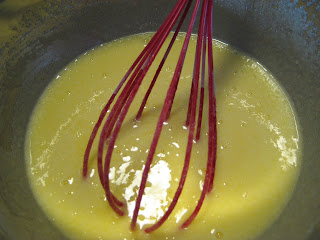
1.  Microwave 3 Tbsp of lemon curd in a microwave-proof bowl for 15 seconds to soften it.  After softening it, whisk the lemon curd.

2.  Whisk 1/2 cup of the Cool Whip into the lemon curd, until completely blended.  

3.  Whisk in the remaining 1 cup of Cool Whip.

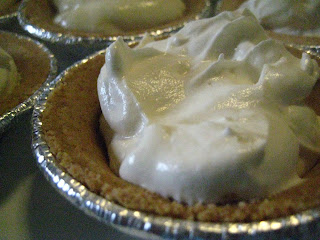
4.  Divide the mixture into the pre-made crusts, putting 1/4 cup of filling in each crust.  (See Sidebar below.) 

5.  You can either top the tarts with the fresh fruit, or refrigerate the untopped tarts until you're ready to serve.  I did the latter, and it helps the filling set up a bit more firmly.

Sidebar: Is anyone else confounded by the math in this recipe?  If I add 1.5 cups of Cool Whip, then how do I only get 1 cup of filling?  And trust me, I thought I would end up with 1.5 cups of filling, and that this was a typo, but you really only end up with 1 cup of filling.  The only thing I can think is that the residual heat of the lemon curd coupled with the whisking of the Cool Whip reduces the final volume of the filling.

For those of you interested, if you make this recipe with the low-calorie Cool Whip, each tart is worth 4 points.  Even if you're not interested in that info, give this recipe a try - it's very satisfying!